Monday, May 20, 2013

Embroidery Basics: Whip Stitch

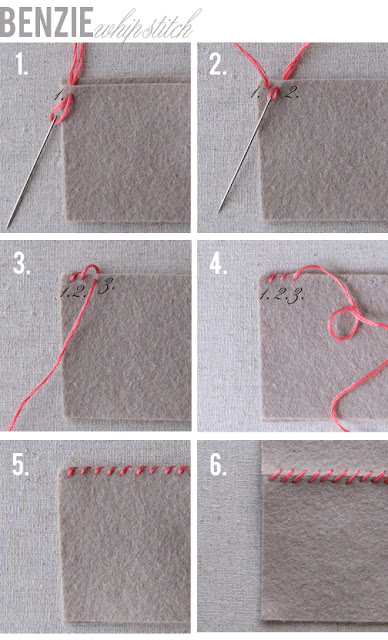
The whip stitch is one of the easiest stitch to learn and the most common first step for beginners -even kids can pick up on this one! There are two ways to use the whip stitch. The first one described is used to connect two layers of fabric -like when making a small pillow or softie. Here are the step-by-step instructions:
whipstitch embroidery tutorial
1. To begin, place your needle and knotted thread in between the two pieces of fabric (felt is used here because it doesn't fray) and up through the top layer of felt at point one. 
2. Take your needle behind both layers of felt and sew through at point two. You will notice that the needle is at an angle, this gives the stitches the diagonal slant.
3. Again bring your needle behind both layers of felt and sew through at point three.
4. & 5. Continue stitching until finished aiming for consistency in spacing and length of stitches.
6. You can also use the whip stitch to attach pieces side by side -just flatten the felt when done. It's like a stitch trick!

And here is a handy diagram:
whipstitch embroidery tutorial
Here we start at the right side of the fabric and move to the left. Constantly whipping the needle at an angle up from the front the the back. Up from one and back around through two.

The second way to use the whip stitch is when attaching an applique or a shape to a piece of clothing or artwork. All the stitches are the same -but the angle of the needle is straight up and down. Here you will notice a piece of felt (my applique) on a linen backdrop.
whipstitch embroidery tutorial
1. Bring your needle and thread behind your applique and background and up at point one.
2. Go back down at point two right where your applique meets the background. You'll want to keep your needle nice and straight.
3. Come back up at point three.
4. Go back down at point 4.
5. Remember to keep your stitches evenly spaced -this will make for a beautiful applique!
6. Keep on going, practice makes perfect!
whipstitch applique embroidery tutorial
Again we start at the left and move to the right (but you can do what works for your project) coming up at one and back down at 2. This is one of my favorite stitches -it makes my projects come together quickly!

More embroidery basics by Benzie: 
Backstich


Friday, May 17, 2013

Embroidery Floss

Felt and Floss
What's that you say? Felt... and embroidery floss? Yes! Benzie now has the most recommended floss in the world -DMC and in every color of our Benzie rainbow. We have searched and scoured for the best hue to coordinate with our shades of wool blend felt making stitching and embroidery projects come together seamlessly.

Rainbow Embroidery Floss from Benzie

Garden Embroidery Floss from Benzie
Our felt collections are a favorite and now there are floss groups to match. These two are my favorite but there are more in the shop. You can also choose floss by its DMC number or by our felt color (it's a whole lot easier to say a name, don't you think?). There may be some hue and shade difference between felt and floss -but you'll find that it coordinates quite well. Welcome to Benzie's newest rainbow!


Tuesday, May 14, 2013

How to cut felt


How to Cut Felt

Update -Benzie is now blogging over at Benzie Design - don't miss any crafty news and tutorials!


It's really quite easy to cut shapes and patterns out of felt -much more precise than pinning, far less fuzzy then transfer pens and cleaner than chalk! And this is by far the most fun! The key is freezer paper (which can be purchased in a roll at your super market or in sheets at your craft store) and a sharp scissors.

This is what you'll need:
-freezer paper
-pattern
-felt
-iron
-pencil
-scissors


1. First trace your pattern onto the matte side of the freezer paper.


2. Iron your freezer paper (wax side down) to your felt. The wax helps to adhere the paper to the felt.

3. Cut out your shapes. I find small scissors helpful when maneuvering around tight corners and sharp tips lend itself to clean and precise cuts.


Cutting Shapes out of Felt

4. Peel paper off. If you find the paper difficult to peel away from the felt -ease up on the heat or reverse the pattern when tracing. You can also reuse your freezer paper -just re-iron and cut. Perfect!

Monday, May 6, 2013

Guest Curator: Noia Land

Noia Land Felt PatternI am so excited to introduce you to Paloma Rocha -pattern designer and creative behind Noia Land. Have you ever seen more adorable creatures? Long legged beauties, woodland friends, garlands -and even brooch patterns! (I'm a total sucker for anything I can pin on my blouse.) And what about Marie Antoinette? Beautiful! 
Noia Land Felt Pattern
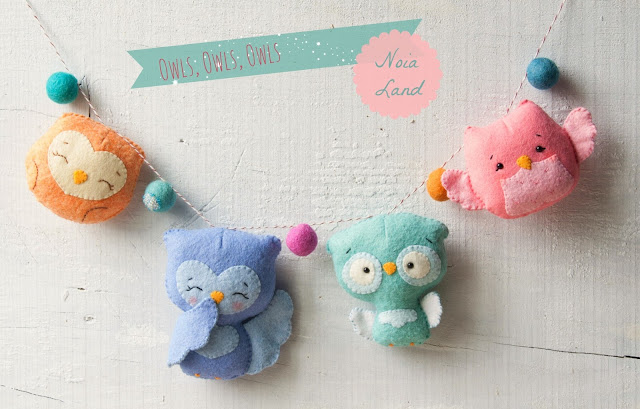
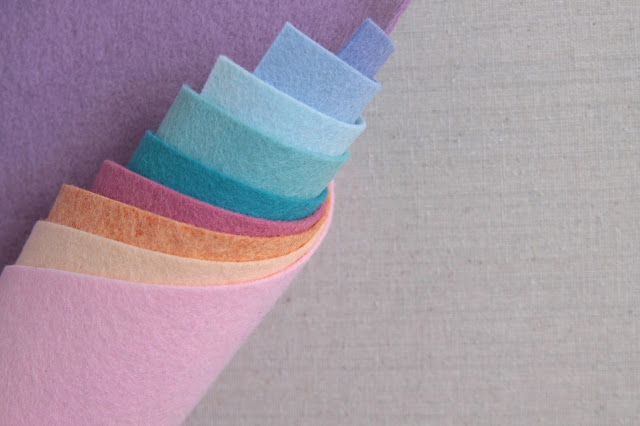
Noia Land has also included an extra special bonus for anyone who purchases her felt collection -a free pdf to make this adorable owl garland! All her patterns uses well designed graphics to help you sew your own doll or animal -and you can use Benzie's felt to get started. Noia Land chose these soft colors of Lilac, Periwinkle, Sky, Icicle, Swan, Peacock, Rose, Cantaloupe, Peach and Pink.
Noia Land Felt

Noia Land Felt
All of these patterns are available for download in Noia Land's shop. Noia Land's curated collection is available at Benzie.
 
09 10 11 12
Blogging tips